

When you’re having trouble finding a certain file on your Windows PC and suspect that you may have accidentally deleted it, there are ways to recover it. Instead of getting frustrated, you can utilize recovery tools to retrieve your deleted files. Microsoft offers its own command-line recovery program, but there are also free programs like Recuva and Glarysoft File Recovery Free that can help you in this process. Here’s a breakdown of how these tools work.
1. Use the Recycle Bin
The first step you should take is to check the Recycle Bin. Windows reserves a small portion of your hard disk space for a hidden system folder known as the Recycle Bin. This ensures that deleted files are not immediately erased but rather stored temporarily. As long as you haven’t permanently deleted the file or emptied the Bin, it should still be accessible for recovery, at least for a certain period of time.
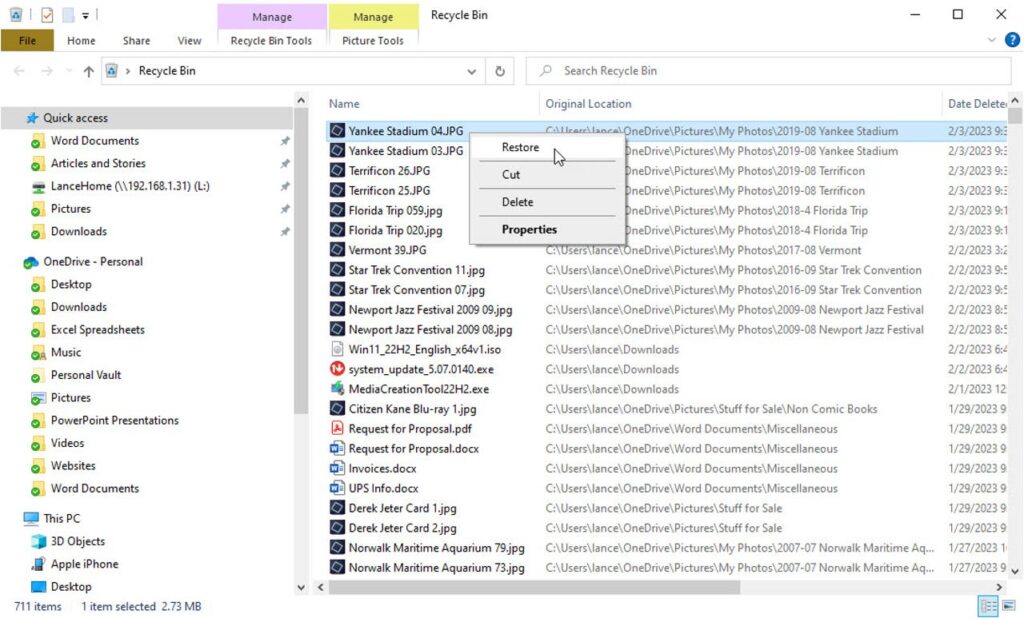
To access the Recycle Bin, simply open the icon on your desktop. Like any other folder, you can sort the files within it by name, location, date, and other criteria. You can even search for a specific file by its name. Once you locate the file you want to recover, right-click on it and select the “Restore” option.
What if I Permanently Delete a File in Windows 10 or 11?
In case you have permanently deleted a file (using Shift+Del) or emptied the entire Recycle Bin, the process of recovering the file becomes more challenging but still possible. The success of recovery largely depends on how quickly you take action.
When you delete a file, it isn’t immediately removed from your disk; instead, the operating system marks the space previously occupied by the file as available for new data. If you act swiftly, there’s a higher chance of recovering the file in its entirety. However, the longer you wait, the more likely it is that the file’s clusters will be overwritten by new data, reducing the chances of a complete recovery.
Using Microsoft’s Windows File Recovery
Microsoft provides a free command-line utility called Windows File Recovery for Windows 10 and 11 users, which attempts to recover deleted files. This tool supports various storage devices such as mechanical hard drives, SSDs, USB drives, and memory cards. It offers both regular and extensive modes to maximize the chances of file recovery.
1. Visit Microsoft’s Recovery Page
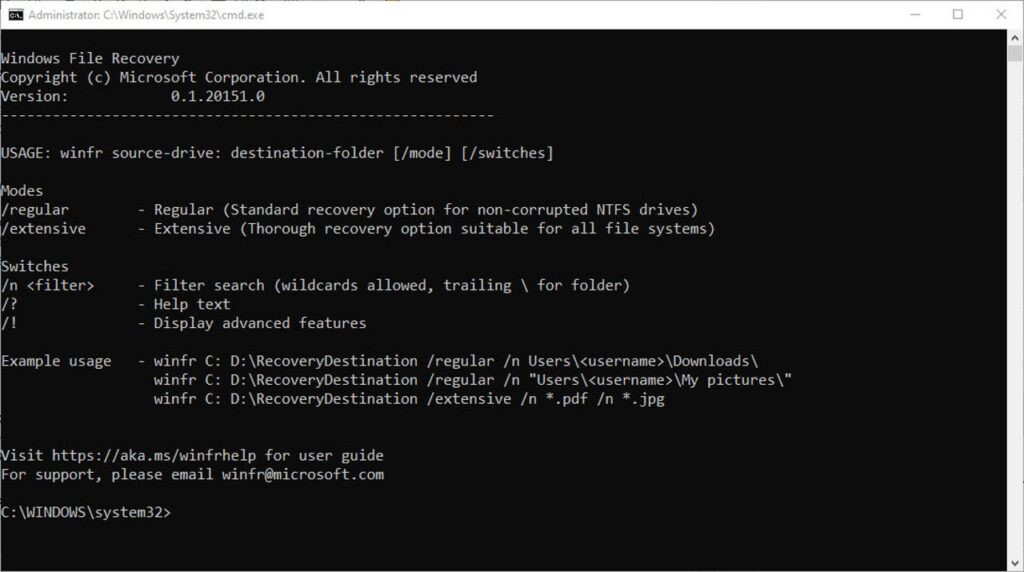
Begin by downloading and installing the Windows File Recovery program from the Microsoft Store. Launching the program opens a command prompt with examples of basic syntax. To ensure you use the tool correctly, refer to Microsoft’s support page for directions on how to use Windows File Recovery.
2. Enter the Appropriate Command
Once you’re familiar with the necessary commands, you need to type them into the command prompt. Start by entering the command followed by the recovery destination, recovery mode, and finally, the name or location of the deleted file or files you wish to recover.
A Note about Windows File Recovery
Windows File Recovery is a command-line program that can be challenging to use, as it requires you to understand and execute the proper syntax and switches. An intuitive graphical user interface (GUI) version of the tool is currently unavailable. Even with the correct usage, it does not guarantee the recovery of all files you need. While it may be worth trying as an initial step, using a third-party recovery product can often be less frustrating and more effective.
Third-Party Recovery Utilities
Various third-party recovery tools are available, both free and paid, and have proven to be successful in many cases. Again, the speed at which you attempt to recover the deleted file is crucial. As long as the file remains intact or mostly intact, these tools can assist in retrieving it. Here are two free utilities worth considering:
Recuva
- Download Recuva
Recuva, available in both free and paid versions, has the capability to recover files from internal and external hard drives, USB sticks, and memory cards. You can obtain the full installation version of Recuva from their website, or opt for the portable version to install on a USB stick, minimizing any potential data writing to your hard drive.
- Specify File Types for Recovery
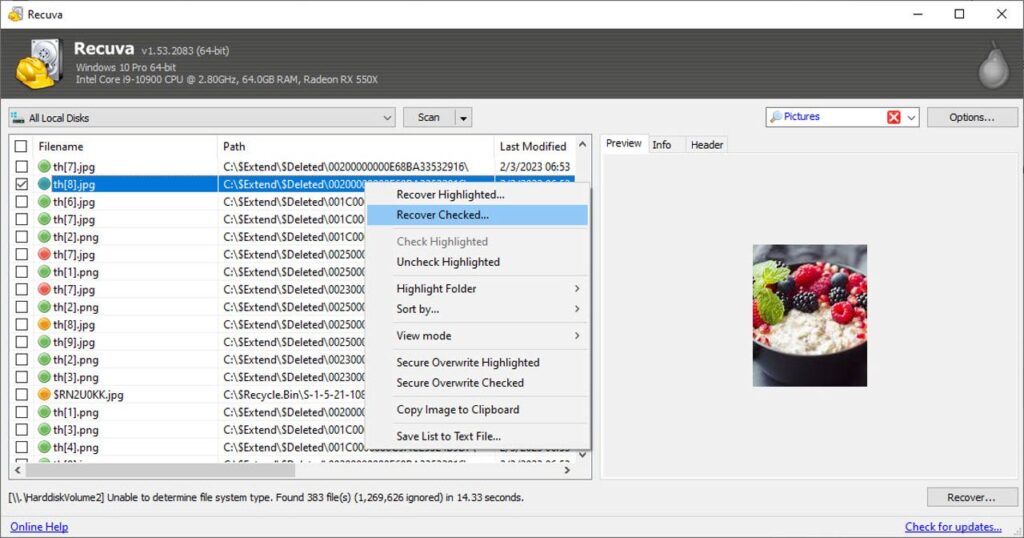
Upon launching Recuva, a wizard will guide you through the recovery process, allowing you to specify the types of files you want to recover and their location. The program will then scan the designated location and present you with a list of deleted files available for recovery.
If you already know the specific filename and path, you can bypass the wizard. Recuva offers both a regular scan for quick and easy recoveries and a deep scan for more complex cases.
- Recover Your Files
After the scan, Recuva will display the names of any matching files and indicate the probability of a successful recovery. You can even preview many file types. Simply select the file you wish to recover and click the “Recover” button to restore it.
Glarysoft File Recovery Free
Another recovery tool, Glarysoft File Recovery Free, is available in both free and paid editions.
- Scan for Deleted Files
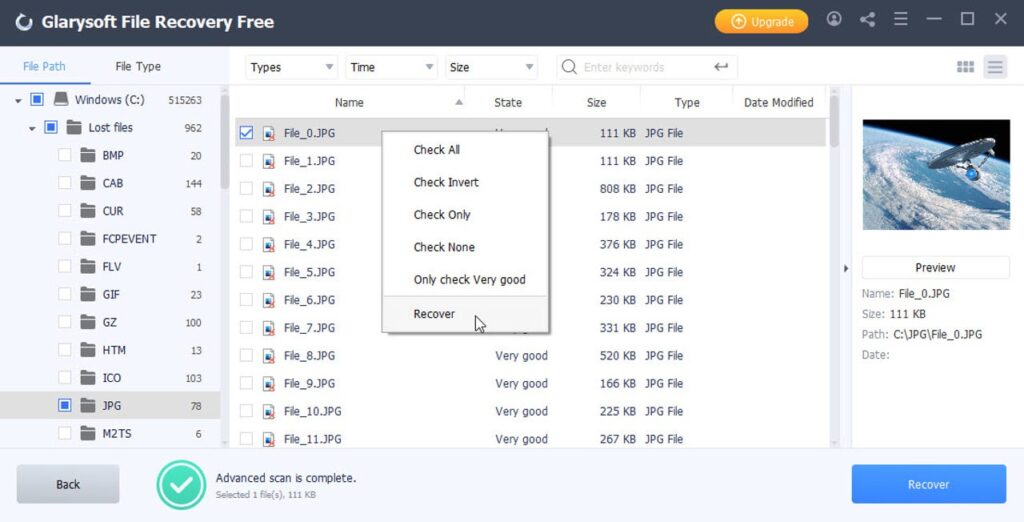
Glarysoft starts by asking you to select the drives or partitions on your PC that you want to scan. It then performs a quick scan to search for deleted files. During or after the scan, you can filter files based on their type, location, and name.
- Preview and Recover Files
Once the scan is complete, the tool provides a list of all lost files and their recovery status, enabling you to browse or search for the specific file you wish to recover. You can even preview images and other readable file types to confirm if you’ve located the correct one.
The main limitation of the free edition is that it allows you to recover only up to three files with a total size of 2GB. For more extensive recovery needs, the Pro edition is available for $50 per year. However, if you only need to recover a few files, the free version should suffice.


